When does someone choose to put a state in redux?
- To avoid props drilling.
- To use the redux state as a cache between mount/unmount.
- To avoid refactoring at a later stage when a new component asks for the same state.
- Some folks dislike the idea to keep API calls inside the component.
- Awesome debugging tool. At least here you can time travel.
There could be more than 5 points, but these are the ones I found most essential.
BUT, when you don’t need 1, 2 and 3 it creates a very small and familiar problem.
My favorite one:
Why are the filters not resetting when I move out of the screen.
componentWillUnmount() {
dispatch({type: "RESET"});
}
What if we can keep the state in component and still get 3, 4 and 5. :D
Solving 4 will automatically solve 3 as long as you are using React redux thunk.
First, let’s get the 4th i.e. Async actions.
1. Creating a custom React useReducer hook.
import { useReducer } from 'react'function useReducerWithThunk(reducer, initialState) {
const[state, dispatch]=useReducer(reducer,initialState);letcustomDispatch=(action)=>{
if (typeofaction==='function') {
action(customDispatch);
} else {
dispatch(action);
}
};return [state, customDispatch];
}
2. Using the above useReducer hook.
import useReducerWithThunk from "./useReducerWithThunk";// Async action creator
const fetchData = () => async (dispatch) => {
dispatch({ type:"FETCH" });
}export default function App() {
const[count, dispatch]=useReducerWithThunk(reducer,0);
function fetchData() {
dispatch(fetchData());
}
return <button onClick={fetchData}>Get Data!</button>
}
Done, that’s all you need to dispatch a function instead of an object. :D
Now, let’s knock down the 5th i.e Awesome Redux Devtools support.
Before that, we need to consider the below points.
- Devtools should support redux’s store along with React userReducer’s.
- The useReducer is completely isolated and we can’t combine them to create a rootReducer which is what we are trying to avoid.
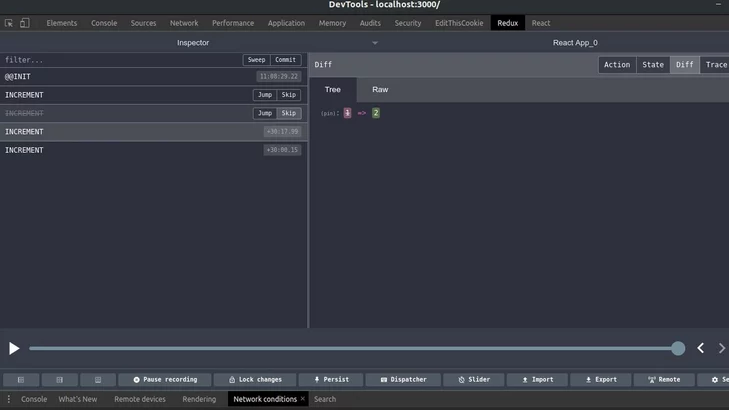
- But, we can create a separate store for each useReducer in dev-tools and switch between them using the dropdown below.
Implementation:
Devtools will only initialize if the name parameter is passed. See below.
Usage:
The above useReducer — React redux hook can be used as below.
const[count, dispatch]= useReducerWithThunk(reducer,0, name // optional);
Result:
Here, a separate instance is created which can be switched using the dropdown.
End Notes:
It would be much better if only a few complicated reducers are connected to Redux devtools or else the overhead involved in switching and finding the appropriate instance will exceed the benefits.
But at least the reason of not able to use devtools should not prevent you from keeping the state local.
Thanks for taking the time to read this, I hope you find it useful.
Reference:
Have a product idea?
Talk to our experts to see how you can turn it
into an engaging, sustainable digital product.


